Getting Started
Before we get into the bits and pieces, you must meet the following requirements.
 Git - Version control system
- A
 Github account - All you need is an email address
  Android SDK - Don't download if you're using Android Auto
- Some kind of IDE - Simple text editor works but it's a pain to use in the long run
- Internet - DUH!
Is it not ideal to run Android Studio when you only have less than 16GB of RAM.
You can use alternative IDE/text editor such as VSCodium (VSCode with no telemetry), but you will not have the ability to use Android emulator.
Now that we have that out of the way, let's get really started!
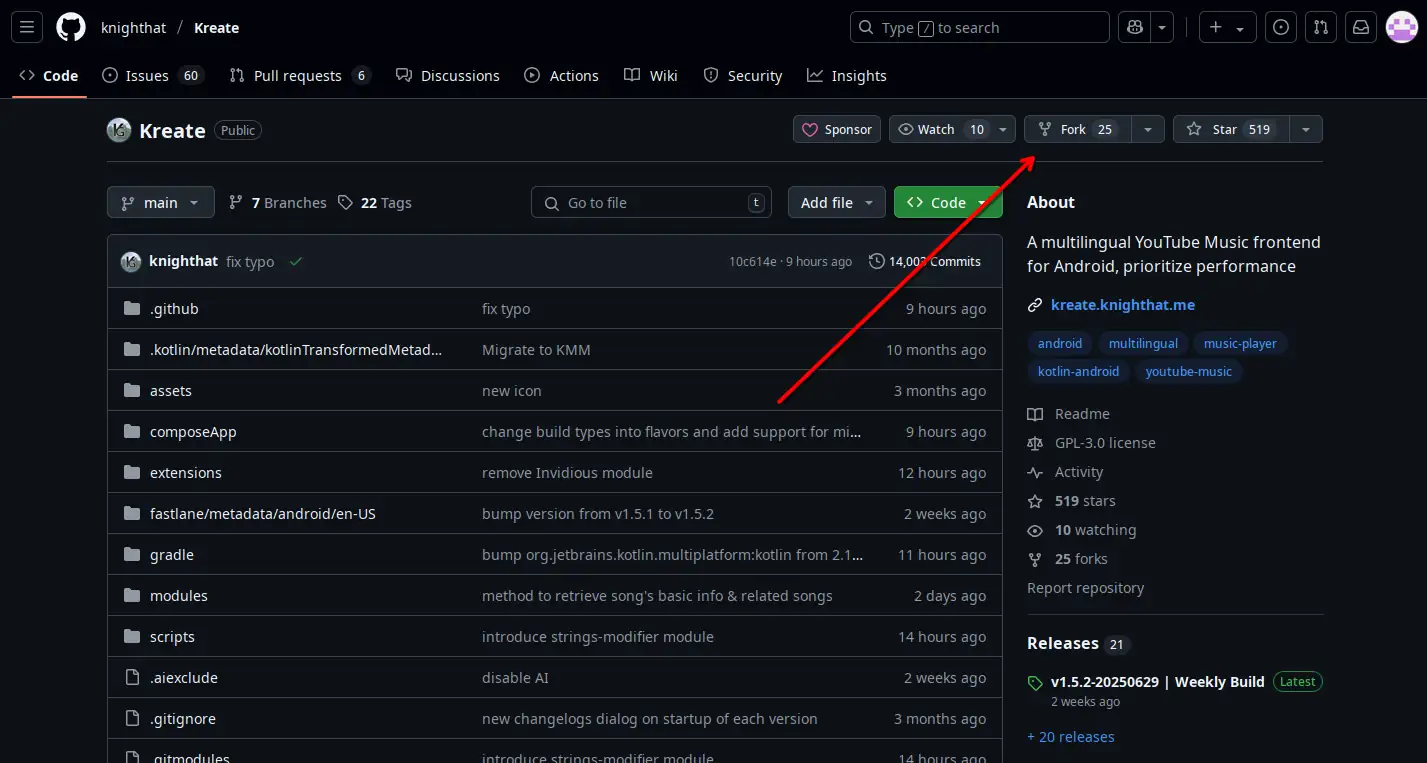
📋 Fork the repository
The first step is not to clone the repo, but to fork it. Without forking, you can't make pull request (PR).
After logging in, go to our remote repository
Github allows you to use SSH key pair to clone repo so you don't have to use secret key every time you want to push from local repo remote repo.
CLICK ME to learn more
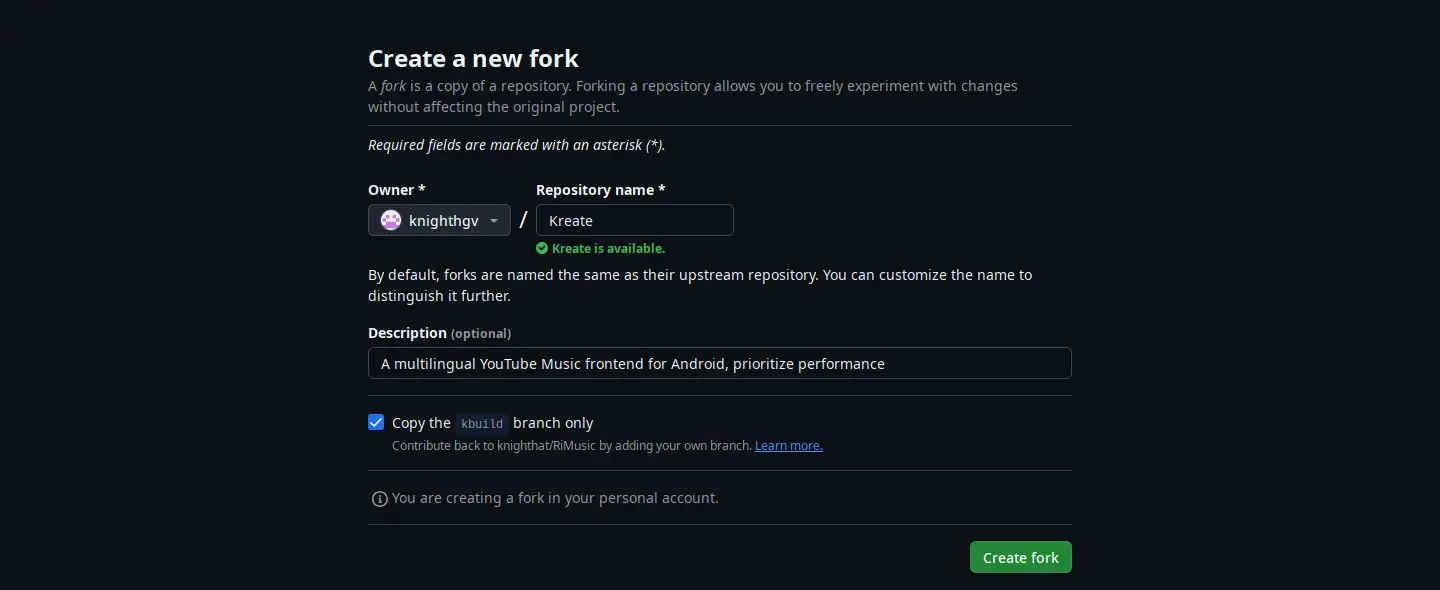
There are some basic information you need to fill out.
Don't worry, you can still modify them later on.
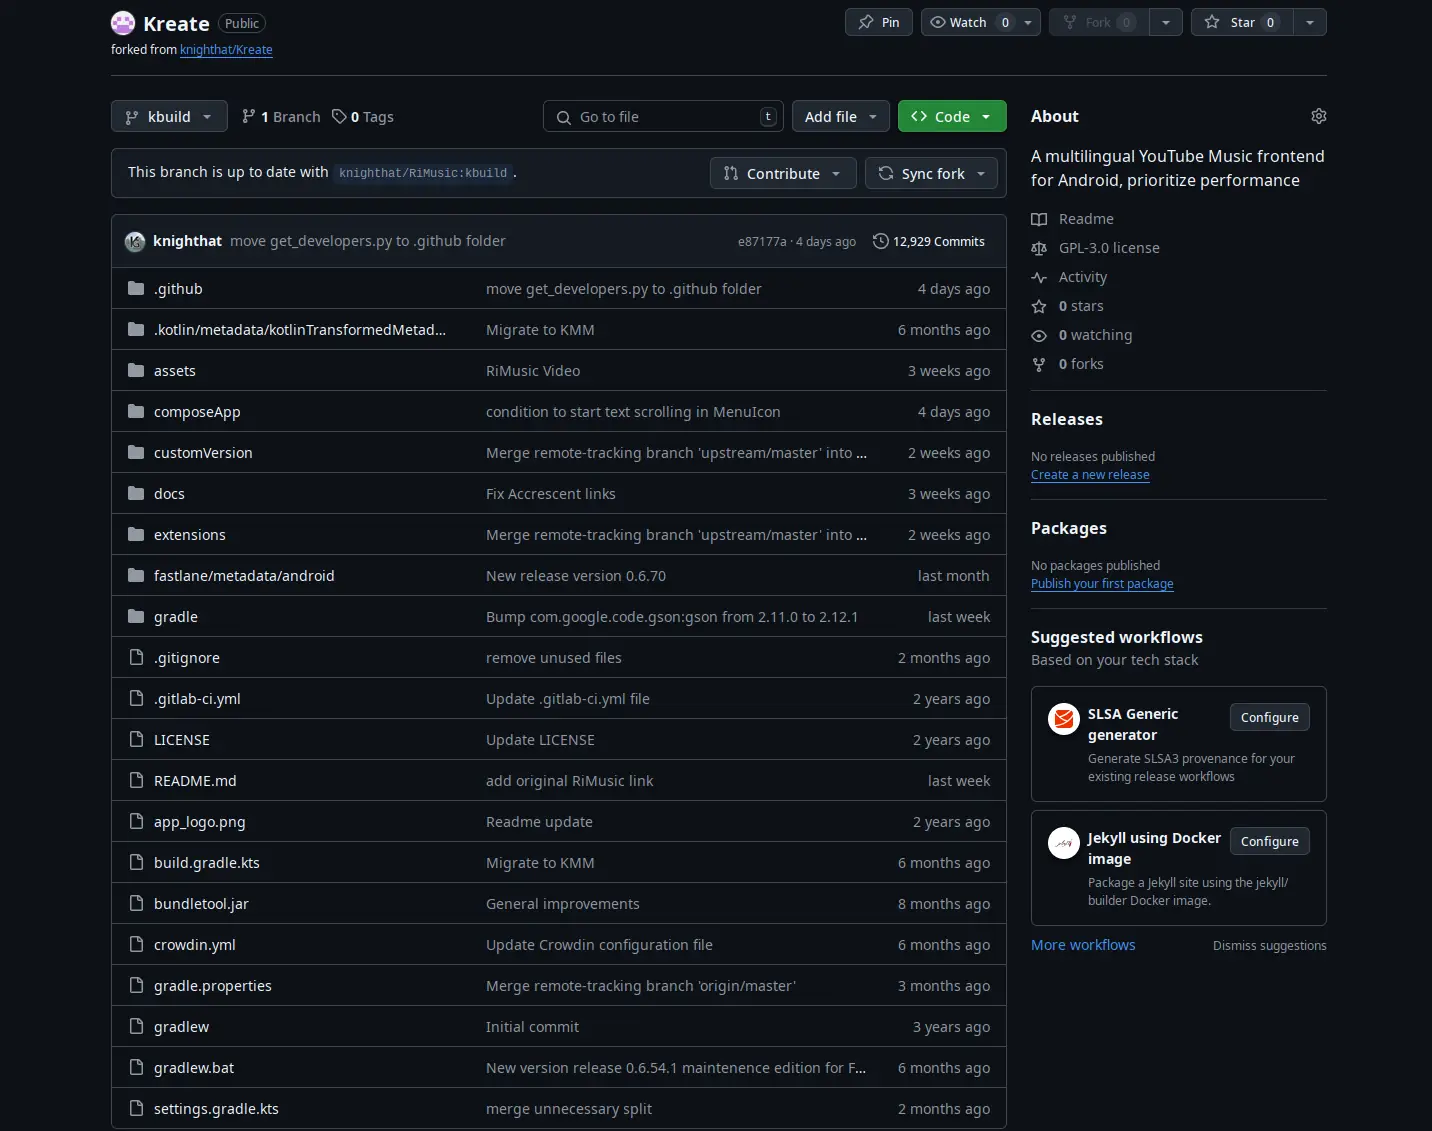
You should create a separate branch for development to keep the main branch in sync with upstream.
Now all you have to do is wait until the forking process is completed.
📥 Clone remote repo to your machine
Cloning via HTTPS
Github has a well written instruction on this matter, here's the link.
Cloning via SSH
This is an advanced feature. However, it helps reduce the time you need to input your password.
As mentioned before, you can use SSH key pair to clone & push your changes without having to generate a Personal Access Token.
To clone the repo using SSH, open your terminal (or command prompt in Windows) and execute this command:
git clone --recurse-submodules git@github.com:[username]/[repo_name]
username is what your account when you register for a Github account.
repo_name is the name of your repo when you fork it.
For example, if my username is knighthat and I name my fork Kreate. The command will be:
git clone --recurse-submodules git@github.com:knighthat/Kreate
This article goes through the process in details. Check it out!
✏️ Making changes to your local repository
From now on, you can start applying changes to the repo you just cloned. This won't affect remote repositories in any way until you commit and publish them.
Modify a file
Let's get started by making some changes to README.md, shall we?
--- a/README.md
+++ b/README.md
@@ -468,3 +468,5 @@ Furthermore, its contents are not affiliated with, funded, authorized, endorsed
 Google LLC or any of its affiliates, subsidiaries.

 Any trademark, service mark, trade name, or other intellectual property rights used in this project are owned by the respective owners.
+
+I just made my first change
There's no easy way to show changes, here's the
git diffversion of the file.
Acknowledge changes
As you can see, I just made my first change is added to the file README.md. Now, we
need to tell git to acknowledge the change
git add README.md
Commit changes
git commit puts acknowledged changes into commit history. A commit can have a message
attached to it at the time of creation. For best practices, check out this article from Baeldung.
Let's say we want to commit change from README.md we just add, execute this command:
git commit -m "my first change"
"my first change" is the message attached to commit. See illustration below:
commit 76b099c466eb4219f250e1cff6ec8f39227893e9 (HEAD -> main)
Author: knighthat <git@knighthat.me>

    my first change
☁️⬆️ Pushing commits to remote repository
To publish your changes to the public, you must push all committed changes to a remote repo.
git push
Git will ask for your credentials if you cloned it via HTTPS.
If you followed SSH guide, you may have to enter your SSH key passphrase (if applicable), but it'll only ask once until you restart your computer (or log out)
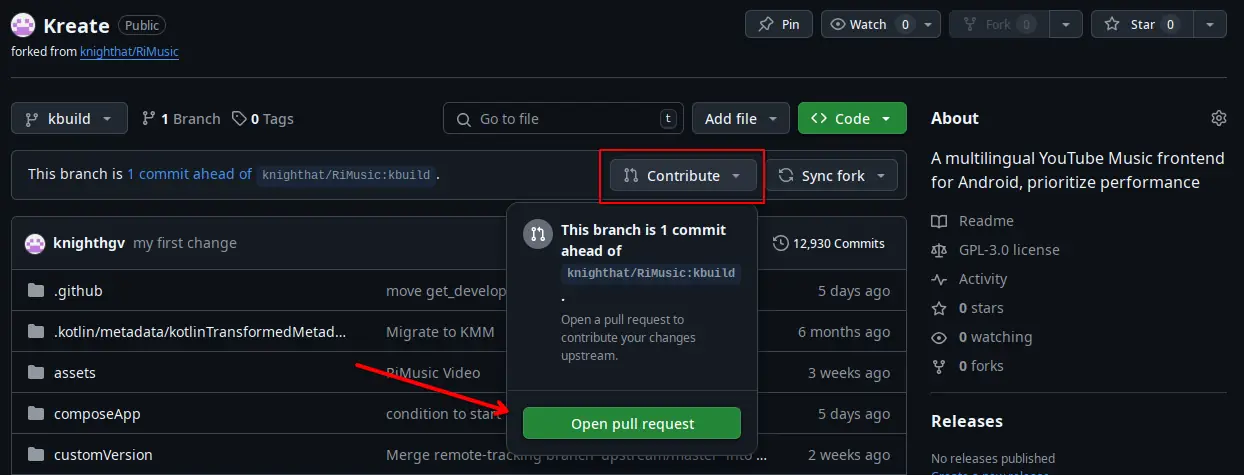
🙏 Make a pull request
To let upstream (knighthat/Kreate) acknowledge your changes you must create a request for maintainers to review.
Via forked repo
Github will tell you how many commits you've pushed that aren't synced to upstream repo
in your personal remote repo. Click on Contribute and Open pull request to start a request.
Via upstream repo
You can also go to upstream repo, click on Pull requests, and New pull request
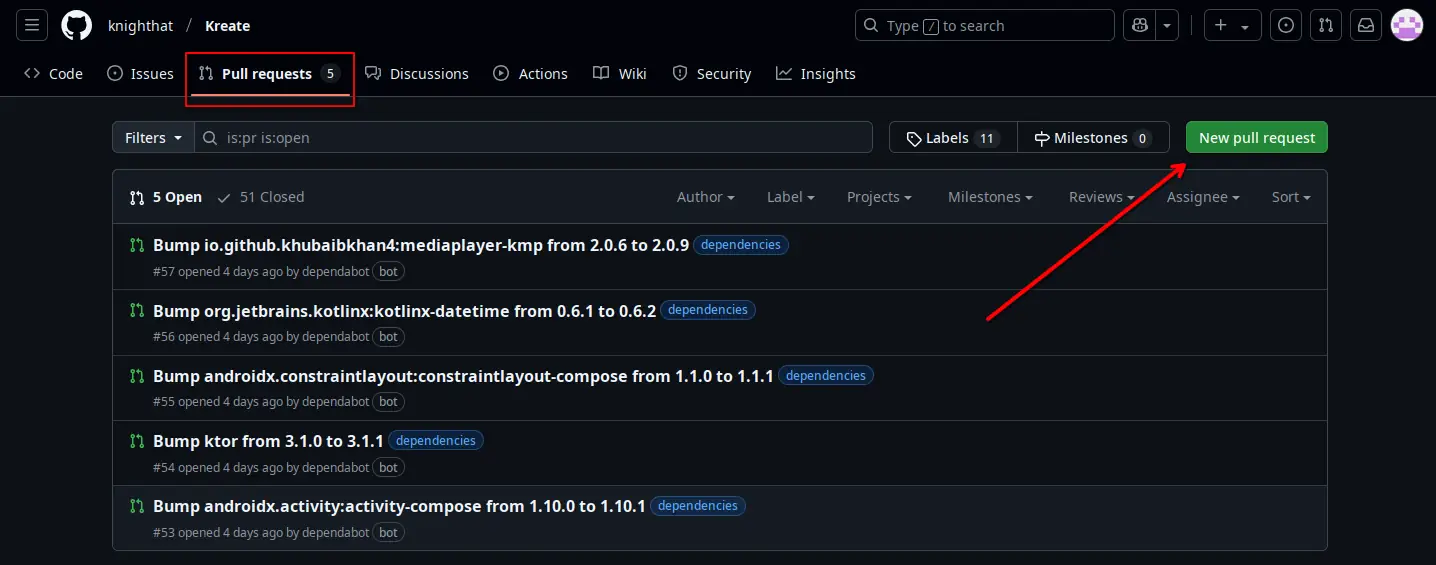
This method requires you to manually select which branch from your repo should upstream pull from.
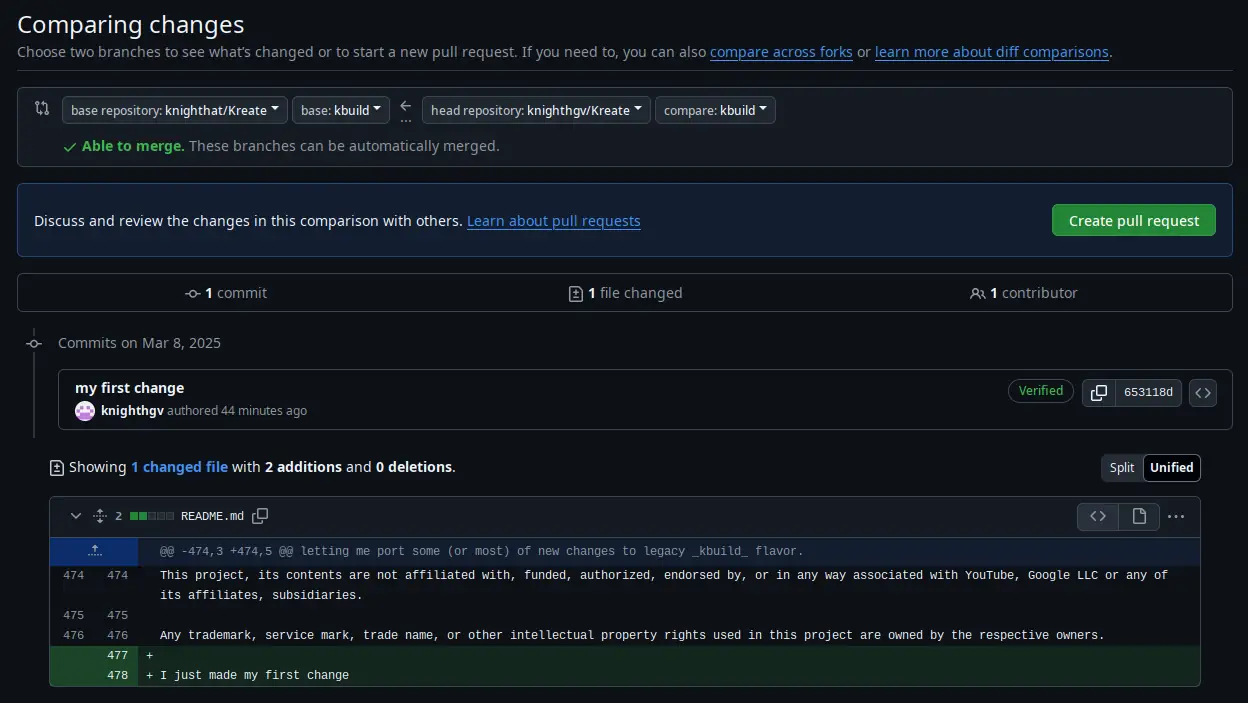
Click on compare across forks if you can't select which repo
base repository is the upstream repo and branch. Usually knighthat/Kreate and main.
head repository is your own remote repo
🗒️ What to write in PR
Writing description can be difficult, especially when you are not fluent in English.
But worry not, this section will break it down to you.
A good PR should only aim to solve ONE and only ONE problem.
Packing multiple things in a pr will only resolve in longer approve time, not to mention the confusion.
The title
Title should be a brief description of your changes. For example:
- When a new feature is added
Just put the name of that feature as the title
- When a bug is fixed
Fixed [short description of bug] #[issue number]
- Correct a typo
Typo [file name]
Description
Description should perfectly describe how these changes will "change" the app.
For example, a fix-a-bug pr should utilize this template:
# Description

# Observation (What triggered the bug)

# Solution
PR with empty description is more likely to be ignored, nobody wants to take their time to analyze your code.
Best case scenario, a maintainer will ask for details information before making a decision.